
Blog
How to Grow Lophophora from Seed
Jul
How to Grow Lophophora from Seed: The Only Guide You’ll Ever Need
Introduction: You Can Grow This “Impossible” Cactus — Here’s Exactly How
Let’s be honest with each other for a moment.
You’ve probably searched for this topic before. Maybe you found a forum post from 2009, a Reddit thread full of contradictions, or a generic cactus care page that mentioned Lophophora once in passing and then moved on.
You’re still here because none of those answered your question properly.
We get it. And we’re going to fix that right now.
Here’s our promise: By the time you finish reading this guide, you will have everything you need soil recipes, humidity targets, germination timelines, seedling care steps, and a clear-eyed understanding of what it really takes — to successfully grow Lophophora from seed at home.
This is not a surface-level overview. This is a complete, practitioner-tested system.
We’ll cover:
- Exactly how to prepare your seeds and growing medium
- The specific environmental conditions that make or break germination
- How to care for seedlings through their first and most vulnerable months
- The most common mistakes beginners make (and how to sidestep every one)
- A realistic, month-by-month growth timeline so you know what to expect
The micro-proof? Lophophora seeds have one of the highest germination rates among cacti when conditions are right — often exceeding 80–90% in a single sow. The challenge isn’t getting them to sprout. The challenge is keeping them alive afterward. That’s exactly what this guide specialises in.
Whether you’re a seasoned cactus collector expanding into seed propagation, or a curious beginner drawn to one of botany’s most fascinating slow-growers, this guide is written for you.
Let’s begin.
What Is Lophophora? A Brief Botanical Primer Before You Sow a Single Seed
Before we talk technique, let’s make sure we’re aligned on what you’re actually growing.
Lophophora is a small genus of spineless, button-shaped cacti native to the Chihuahuan Desert of Mexico and parts of Texas. The genus contains several recognised species, including:
- Lophophora williamsii — commonly known as peyote, the most well-known species
- Lophophora diffusa — a pale, yellowish-green species with fewer alkaloids, often the preferred legal choice for ornamental growers
- Lophophora fricii — a lesser-known species, increasingly popular with collectors
- Lophophora alberto-vojtechii and other cultivar forms
Why do people grow them?
The reasons are as varied as the growers themselves:
- Botanical fascination — few cacti are as scientifically interesting
- Conservation interest — Lophophora is endangered in the wild due to overharvesting and habitat loss
- Collection diversity — their unique spineless, woolly appearance is unlike most cacti
- Slow-growing satisfaction — for patient growers, watching a seedling develop over years is deeply rewarding
- Cultural and ceremonial significance — for indigenous communities, L. williamsii carries profound spiritual meaning
For most readers of this guide, the appeal is horticultural. These are extraordinary plants to grow, photograph, and care for — and growing them from seed is the most rewarding method of all.
Understanding Lophophora Germination: What Actually Happens Underground
Before you can succeed, you need to understand the biological process you’re managing.
The Germination Window
Lophophora seeds germinate relatively quickly when conditions are right. You can typically expect to see the first signs of life — tiny green dots emerging from the soil surface — within 7 to 14 days of sowing.
Some seeds will germinate as early as day 4 or 5. Others may take 3 weeks. This variation is completely normal and does not indicate failure.
What Seeds Need to Germinate
Every seed has a set of non-negotiable requirements. For Lophophora, those are:
- Moisture — consistent but not waterlogged. The growing medium should be evenly damp at all times
- Warmth — a soil temperature of 20–28°C (68–82°F) is ideal. Bottom heat is particularly effective
- Humidity — ambient humidity inside your germination enclosure should stay between 70–90%
- Light — seeds need light to germinate effectively. Bright, indirect light or a grow light placed 30–45 cm (12–18 inches) above the container
- Freshness — Lophophora seeds lose viability relatively quickly. Seeds sown within 6–12 months of harvest germinate significantly more reliably than old stock
The Role of Seed Freshness
This point deserves its own spotlight because it’s the number one reason people experience poor germination rates.
Fresh Lophophora seeds can achieve 80–90% germination rates. Seeds that are 2–3 years old may struggle to achieve even 20–30%.
Always source your seeds from reputable suppliers who state the harvest date. If no harvest date is listed, ask. If the seller can’t or won’t tell you, source elsewhere.
How to Grow Lophophora from Seed: Step-by-Step System
Now we get into the practical heart of this guide. Follow these steps in order. Skip nothing.
Step 1: Gather Your Equipment
You don’t need expensive equipment. Here’s the complete list:
Essential items:
- Small plastic container with a lid (a repurposed takeaway/deli container works perfectly)
- Or a seed tray with a transparent humidity dome
- Fine-mesh seed sieve or kitchen sieve
- Spray bottle
- Seedling heat mat (optional but strongly recommended)
- Grow light or bright windowsill
- Labels and a permanent marker
Optional but useful:
- Small thermometer/hygrometer (to monitor temperature and humidity inside the enclosure)
- Shallow tray for bottom-watering
- Capillary matting
The beauty of Lophophora seed germination is its accessibility. A clear takeaway container with a lid is genuinely all you need to house a thriving germination setup.
Step 2: Prepare Your Growing Medium
The growing medium is arguably the single most important decision you’ll make. Get this right and you’ve solved half the problem.
What Lophophora seedlings need from a growing medium:
- Excellent drainage — they cannot tolerate waterlogged roots at any stage
- Low fertility — high-nutrient compost encourages damping-off fungus and moss growth
- Good aeration — roots need oxygen
- Moisture retention (balanced) — enough to stay damp between mistings, but not enough to stay wet
The Recommended Seed Mix Recipes
Here are three proven mixes, listed from simplest to most refined:
Beginner Mix (Simple & Effective):
- 50% horticultural sand (coarse, not builder’s sand)
- 50% multipurpose compost or peat
Intermediate Mix (Better Drainage):
- 40% perlite
- 30% coarse sand or fine grit
- 30% peat or coir
Advanced Mix (Optimal):
- 30% pumice
- 30% perlite
- 20% coarse horticultural sand
- 20% sterilised cactus compost (or very fine, well-composted bark)
Important: Sterilise your mix before use.
Spread it on a baking tray and bake at 120°C (250°F) for 30 minutes. Or pour boiling water through it and allow it to cool and drain fully before use. This kills fungal spores and weed seeds that can devastate a young sowing.
Allow the mix to cool completely before adding seeds.
Step 3: Fill and Prepare Your Container
- Fill your chosen container with the prepared, sterilised growing mix to approximately 2–3 cm (1 inch) depth
- Gently firm the surface — you want it level and lightly compact, not loose and crumbly
- Using a fine spray bottle, mist the surface thoroughly until the top centimetre is visibly damp but not saturated
- Allow excess water to drain if using a container with holes
- If using a sealed takeaway container, ensure there’s no standing water at the bottom
The surface should look and feel like a just-squeezed sponge: damp but not dripping.
Step 4: Sow Your Lophophora Seeds
This step requires care but not perfection.
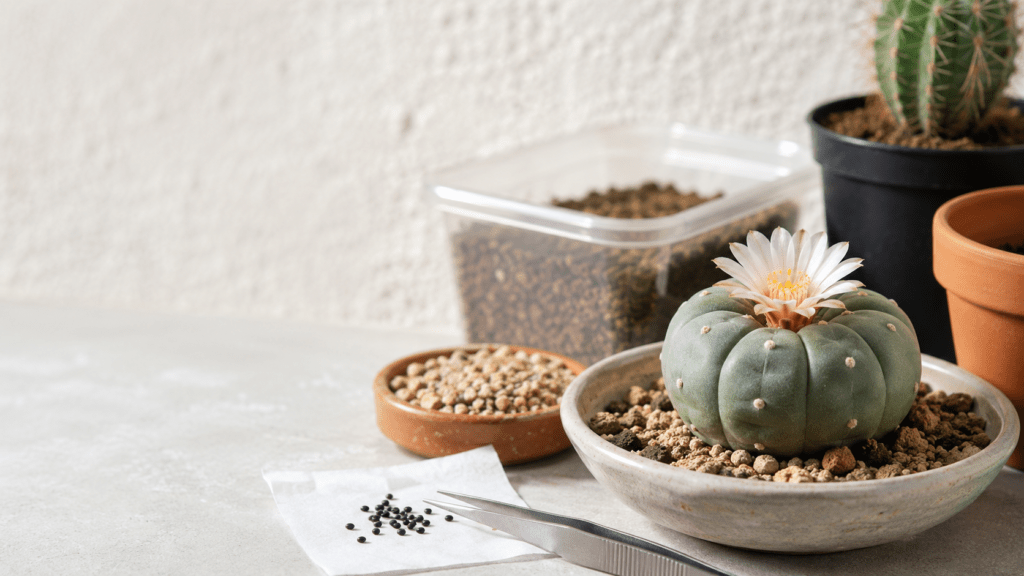
- Open your seed packet and tip seeds onto a clean, white piece of paper — this makes them visible against the light background
- Lophophora seeds are small, dark, slightly kidney-shaped, and irregular. They range from 1.5–2mm in size
- Using a toothpick, cocktail stick, or moistened fingertip, place seeds individually onto the surface of your prepared mix
- Space them approximately 1–2 cm apart — this reduces competition and makes separating seedlings easier later
- Do not bury the seeds. Place them on the surface and press them very gently into contact with the medium
- Optionally, add a very thin surface layer of fine sand or gravel (1–2mm) — this helps maintain moisture at the germination surface and reduces moss growth
Sowing density: For a small 10x15cm container, sowing 20–40 seeds is appropriate. Don’t over-sow. Crowded seedlings compete for light and are harder to manage.
Step 5: Create Your Humidity Chamber
This is where magic happens — or where neglect begins.
Lophophora seeds need high ambient humidity to germinate successfully. Without it, the surface dries out between mistings and germination stalls.
Method 1: Sealed Takeaway Container
Simply snap the lid onto your container. Done. The sealed environment maintains near-100% humidity without any additional intervention.
Method 2: Seed Tray with Dome
Place a clear plastic humidity dome over your seed tray. Many commercial seed trays include these. Seal gaps with cling film if needed.
Method 3: Plastic Bag
Place your seeded pot inside a clear zip-lock bag or clear polythene bag. Inflate slightly and seal. This works well for small individual pots.
Step 6: Position for Warmth and Light
Temperature:
Place your germination chamber where temperatures will consistently sit between 20–28°C (68–82°F). This might be:
- On top of a heat mat set to 25°C
- On top of a refrigerator (the motor generates gentle warmth)
- In a warm room during summer months
- Under a grow light that provides gentle warmth
Avoid cold windowsills in winter. Temperature fluctuations below 18°C will significantly slow or halt germination.
Light:
Seeds need light to germinate. Options include:
- Bright indirect natural light — a south-facing windowsill (north in the southern hemisphere) is ideal. Keep out of direct, harsh midday sun which can cause rapid drying and overheating inside the sealed container
- LED grow light — position 30–45 cm (12–18 inches) above the container, running 14–16 hours per day
A photoperiod of 14–16 hours of light per day is optimal both for germination and early seedling development.
Step 7: Monitor and Maintain
For the first week to two weeks, your primary job is to resist the urge to interfere.
Check your container daily, but keep these simple maintenance tasks in mind:
| What to Check | What to Do |
|---|---|
| Surface moisture | Mist gently if surface appears dry usually every 2–4 days in a sealed container |
| Condensation on lid | Normal and healthy in the first 1–2 weeks. Too much can drip and dislodge seeds — tilt container slightly to drain |
| Green fuzz or moss | Small amount is normal. Heavy growth indicates too much nutrient in mix remove physically |
| First seedlings (tiny green dots) | Leave them completely alone. Do not disturb. |
| Temperature | Should stay within range. Adjust heat mat or room temperature if needed |
Step 8: What to Do When Seeds Germinate
Within 7–21 days, you will begin to see tiny green spheres some as small as 1mm pushing up through the soil surface.
This is the most critical and most beautiful moment.
What to do:
- Do nothing dramatic. The seedlings are incredibly fragile at this stage
- Continue maintaining humidity do not suddenly open the container
- Ensure light levels are consistent and bright
- If using a grow light, keep it running on its existing schedule
What NOT to do:
- Do not mist directly onto the seedlings this can dislodge or damage them
- Do not move the container to a darker location they need light immediately
- Do not remove the lid for at least 4–6 weeks after germination
Lophophora Seedling Care: The Critical First Months
Getting seeds to germinate is the beginning, not the end. Here’s how to care for your seedlings through their most vulnerable phase.
Weeks 3–8: Life Inside the Chamber
During this period, your seedlings will grow from tiny green dots to small, recognisable cactus buttons — still only 2–5mm in diameter, but identifiably Lophophora.
What’s happening:
- The seedling is developing its first root system
- It is photosynthesising and beginning to establish
- It is highly susceptible to damping-off (a fungal condition that causes rapid seedling collapse)
Key care practices:
- Mist the sides of the container, not the seedlings directly, to maintain humidity without waterlogging
- Begin opening the container lid for 5–10 minutes per day from around week 4 to slowly introduce airflow
- If you spot any white fuzzy mold or collapsed seedlings, act immediately (see Pitfall Alert below)
Months 2–6: Gradual Hardening Off
Over this period, you’re transitioning your seedlings from the sealed, humid environment to ambient growing conditions — gradually.
The weaning schedule:
| Week | Ventilation |
|---|---|
| Week 1–2 after germination | Fully sealed |
| Week 3–4 | Open 10 minutes per day |
| Week 5–6 | Open 30 minutes twice per day |
| Week 7–8 | Lid propped open slightly at all times |
| Week 9–10 | Lid removed during daylight hours |
| Week 12+ | Fully open, ambient conditions |
This gradual process prevents the sudden drop in humidity that causes rapid dessication in tiny seedlings.
Watering after opening:
Once fully open, water from the bottom by placing the container in a tray of water and allowing capillary action to draw moisture up. Allow the surface to dry between waterings. Never allow seedlings to sit in standing water for more than 30 minutes.
Month 6 Onward: Establishing Young Plants
By month 6, your seedlings will typically be 5–10mm in diameter — small, but unmistakably Lophophora. They’ll begin to show the characteristic woolly tufts at their growing points.
From this stage:
- Water sparingly and only when the medium has dried through
- Begin a very dilute cactus fertiliser (quarter strength, low nitrogen, high phosphorus and potassium) every 4–6 weeks during the growing season (spring–summer)
- Maintain bright light — 14–16 hours under a grow light, or a south-facing window with direct morning or evening sun
- Keep winter temperatures above 10°C (50°F), ideally above 15°C indoors
- Do not repot until seedlings are at least 1–2 cm in diameter, typically at 18–24 months.
The Realistic Lophophora Growth Timeline
Here’s what to genuinely expect, month by month and year by year:
| Time From Sowing | Expected Size/Stage |
|---|---|
| Day 7–14 | First green dots visible on surface (1–2mm) |
| Week 3–4 | Tiny spherical seedlings (2–4mm), first root hairs developing |
| Month 2–3 | Recognisable cactus buttons (4–8mm), first woolly tufts forming |
| Month 6 | Small but established plants (8–15mm), hardening off complete |
| Year 1 | 1–2cm diameter, established, growing slowly but steadily |
| Year 2–3 | 2–4cm diameter, first signs of mature form visible |
| Year 5–7 | 4–7cm diameter, may produce first flowers |
| Year 7–10+ | Mature, flowering, potentially offsetting plant |
A note on variability: These timelines assume good conditions consistent warmth, adequate light, appropriate watering. Suboptimal conditions extend timelines considerably. Ideal conditions may compress them slightly.
Common Mistakes That Kill Lophophora Seedlings (And How to Avoid Every One)
This section is where most growing guides completely fail you. Let’s be specific.
Mistake 1: Overwatering
The single most common cause of seedling death.
Lophophora seedlings are desert cacti. They are biologically programmed for periods of drought followed by occasional moisture. Young seedlings are susceptible to root rot the moment they sit in wet medium for too long.
Fix: Bottom water only once seedlings are established. Allow medium to dry between waterings. When in doubt, wait another day.
Mistake 2: Using Unsterilised Growing Medium
Garden soil, unsterilised compost, or potting mix from the garden centre carries fungal spores, bacteria, and weed seeds. In the warm, humid environment of your germination chamber, these explode into life and outcompete or directly kill your seedlings.
Fix: Always sterilise your mix before sowing. It takes 30 minutes in the oven and is non-negotiable.
Mistake 3: Opening the Container Too Early
Beginners, excited and curious, open their germination containers to inspect progress. The sudden drop in humidity shocks and desiccates seedlings almost instantly.
Fix: Follow the gradual weaning schedule above. Resist the urge. Take photos through the lid if you need visual reassurance.
Mistake 4: Insufficient Light
Many growers place their germination containers on a windowsill and consider the matter solved. But a north-facing window in winter, or a windowsill behind glass that filters UV, often provides insufficient light for healthy growth.
Fix: If your seedlings are growing very slowly, appear pale green or yellowish, or are etiolating (stretching upward), increase light intensity. A budget LED grow light resolves this entirely.
Mistake 5: Using Old Seeds Without Testing Viability
As discussed earlier, Lophophora seed viability drops sharply with age. Many growers purchase cheap seeds online with no harvest date listed, sow them carefully, follow all instructions perfectly and achieve 5% germination.
Fix: Source from reputable suppliers who provide harvest dates. Expect to pay a reasonable price for fresh, viable seed. If price seems too good to be true, the seeds are probably old.
Mistake 6: Expecting Fast Results
This is a mindset mistake, not a technique mistake — but it causes real harm.
Growers who expect visible, impressive growth within weeks will inevitably conclude they’re failing when growth doesn’t appear. They change their approach, over-water in frustration, or simply abandon the sowing.
Fix: Set your expectations correctly before you start. Read this guide’s growth timeline. Understand that a 6-month-old Lophophora seedling the size of a grape pip is a triumph, not a disappointment.
Soil, Light, Temperature, and Humidity: Quick Reference Card
For those who want to save and revisit the key numbers:
| Parameter | Germination Phase | Established Seedling |
|---|---|---|
| Soil mix | Fine, sterilised, well-draining | Coarser, well-draining cactus mix |
| Humidity | 70–90% | Ambient (30–60%) |
| Temperature | 22–28°C (72–82°F) | 18–30°C (65–86°F) daytime |
| Light (hours/day) | 14–16 hours | 14–16 hours |
| Light type | Bright indirect / LED | Direct morning sun or LED |
| Watering | Surface misting | Bottom water, infrequent |
| Fertiliser | None | Dilute cactus feed, monthly (growing season) |
| Repotting | N/A | After 18–24 months |
Where to Source Lophophora Seeds: What to Look For
Seed quality is the foundation of everything.
What to look for in a supplier:
- Harvest date clearly stated — non-negotiable
- Species clearly identified — especially important if you’re in a jurisdiction where L. williamsii is controlled
- Positive reviews from other growers, particularly regarding germination rates
- Reasonable pricing — fresh Lophophora seeds from reputable suppliers are not extremely cheap. If a supplier is selling 50 seeds for £1, ask why
- Legal compliance — ensure the supplier is operating legally in both their jurisdiction and yours
Where to look:
Reputable cactus specialist nurseries, established succulent seed suppliers in Europe, and well-reviewed members of dedicated cactus forums and communities. Always do your due diligence.
[Internal Link Suggestion 1: Anchor text — “how to sterilise cactus growing medium” — link to your guide on sterilising soil for seed sowing]
[Internal Link Suggestion 2: Anchor text — “best LED grow lights for cactus seedlings” — link to your grow light comparison or review article]
[Internal Link Suggestion 3: Anchor text — “complete cactus seed germination guide” — link to your broader seed germination guide for cacti and succulents]
External Reference 1: For botanical classification and conservation status of Lophophora species, refer to the IUCN Red List — Lophophora williamsii is listed as Vulnerable due to habitat loss and overharvesting.
External Reference 2: The Royal Horticultural Society (RHS) provides excellent general guidance on seed germination technique, humidity management, and seedling care that translates well to cactus growing.
External Reference 3: Research on cactus germination ecology from the University of Arizona Herbarium provides valuable scientific context for understanding desert plant germination requirements.
FAQ: How to Grow Lophophora from Seed — Your Questions Answered
Schema-ready FAQ section targeting featured snippet positions:
Q1: How long does it take for Lophophora seeds to germinate?
Lophophora seeds typically germinate within 7 to 21 days when kept at a soil temperature of 22–28°C (72–82°F) with high humidity (70–90%) and bright indirect light. Fresh seeds (harvested within the past 6–12 months) tend to germinate within the shorter end of this range. Older seeds may take longer or fail to germinate entirely.
Q2: What is the best soil mix for growing Lophophora from seed?
The best soil mix for Lophophora seed germination is a well-draining, low-fertility blend. A recommended intermediate mix is: 40% perlite, 30% coarse horticultural sand, and 30% peat or coir. Always sterilise the mix before use by baking at 120°C for 30 minutes or drenching with boiling water. Avoid standard garden soil or unmodified multipurpose compost, as both retain too much moisture and encourage fungal damping-off.
Q3: Why are my Lophophora seedlings dying after germination?
The most common causes of Lophophora seedling death after germination are: (1) Damping-off caused by fungal pathogens in unsterilised or overly wet growing medium, (2) overwatering, (3) sudden humidity drops from opening the germination container too early, and (4) insufficient light. Check each of these factors systematically. Damping-off presents as seedlings collapsing at the base; treat with copper fungicide and increase ventilation gradually.
Q4: Can I grow Lophophora indoors from seed?
Yes. Lophophora can be successfully grown indoors from seed using basic equipment: a small clear container with a lid, a sterilised gritty growing mix, a seedling heat mat, and a grow light or bright south-facing windowsill. Many of the most successful Lophophora growers operate entirely indoors using LED grow lights and simple humidity chambers. Indoor growing offers the advantage of year-round temperature control.
Q5: How big will Lophophora seedlings be after one year?
After one year of growth under good conditions, Lophophora seedlings are typically 1–2 cm (0.5–1 inch) in diameter. This may seem small, but it represents healthy, appropriate growth for this genus. By year 3, plants may reach 2–4 cm in diameter. Lophophora is one of the slowest-growing cacti and may take 7–10 years to reach full maturity from seed.
Q6: When should I repot Lophophora seedlings?
Lophophora seedlings should not be repotted until they are at least 1–2 cm in diameter, which typically occurs at around 18–24 months of age. Repotting too early disturbs the delicate root system and sets growth back significantly. When repotting, use a well-draining cactus mix, allow the roots to air dry for 24–48 hours after disturbing, and do not water for at least one week after repotting.
Q7: Is it legal to grow Lophophora from seed?
The legality of growing Lophophora from seed varies significantly by country and jurisdiction. Lophophora williamsii (peyote) is a Schedule I controlled substance in the United States and is controlled in the UK and several other countries. Other species, such as Lophophora diffusa, may have different legal statuses in some regions. Always research your local laws thoroughly before obtaining or germinating any Lophophora species. This guide is intended for legal, educational, and horticultural purposes only.
Conclusion: You Have Everything You Need Now Comes the Patient Part
Let’s recap what we’ve covered.
You now know:
- Exactly which equipment you need (and which you don’t)
- Three tested soil mix recipes appropriate for beginners through advanced growers
- A precise, step-by-step sowing process from container preparation to seed placement
- How to create and manage a humidity chamber for optimal germination
- A detailed seedling care protocol through the first 6 months and beyond
- A realistic growth timeline so you never confuse slow growth with failure
- The seven most common mistakes and exactly how to avoid each one
- A schema-ready FAQ covering the questions you’ll inevitably ask next
This is not a short-term project. Growing Lophophora from seed is a long-term relationship with a plant, with patience, and with the quiet discipline of doing the small things correctly over and over.
The growers who succeed are not the most skilled. They are the most consistent.
They check their containers. They adjust their setup. They don’t panic when growth is slow. They trust the process.
Now it’s your turn.
Your Call to Action: Start This Weekend
Here’s your actionable challenge: this weekend, gather your materials.
That means:
- Source fresh Lophophora seeds from a reputable supplier (check the harvest date)
- Purchase or assemble your growing medium ingredients
- Find a clear container with a lid
- Clear a spot under your grow light or on your sunniest windowsill
You don’t need to wait for the perfect moment. You don’t need to read one more forum thread. You have the system. Now execute it.
In 7–14 days, you’ll see tiny green dots pushing through the soil and you’ll understand exactly why growers of this extraordinary plant become lifelong devotees.
Have a question about your specific setup, growing conditions, or seed source? Drop it in the comments below — we read and respond to every one.
